Plinqx Publisher Named Credentials
Available: Base
Overview
Plinqx Publisher uses Salesforce Named Credentials (and related External Credentials) to securely store:
- The base URL for an external system
- The authentication mechanism (for example, Basic Auth, OAuth 2.0, or JWT)
- Optional secret values (for example, API keys) stored encrypted
Once configured, a Named Credential can be referenced from Plinqx Publisher Inbound/Outbound configurations instead of hard-coding URLs and credentials in endpoints.
Prerequisites
Access
You need access to:
- The Plinqx app in Salesforce
- The Publisher tab
- Salesforce Setup (to review/edit the created Named Credential)
Recommended permissions (admin/configurator)
- Permission to create/modify Named Credentials and External Credentials in Salesforce Setup
- Any Plinqx permission sets required to access Publisher -> Named Credentials
Where Named Credentials are used in Publisher
Publisher endpoints can reference a Named Credential. For example, an Outbound endpoint detail includes a NamedCredential value that determines what base URL and authentication will be used when the callout runs.
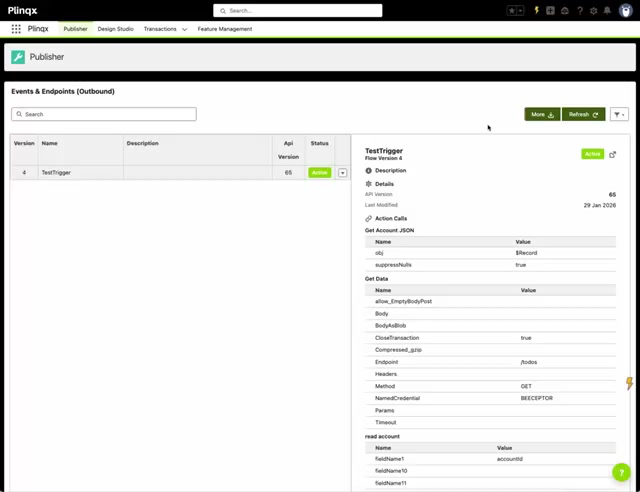
Create a Named Credential from Plinqx Publisher
Open Named Credentials in Publisher
- Open the Plinqx app.
- Navigate to Publisher.
- Open Events and Endpoints (Named Credentials).
Tip: This screen lists the Named Credentials created via the Plinqx Publisher experience.
Start the wizard
- Click New.
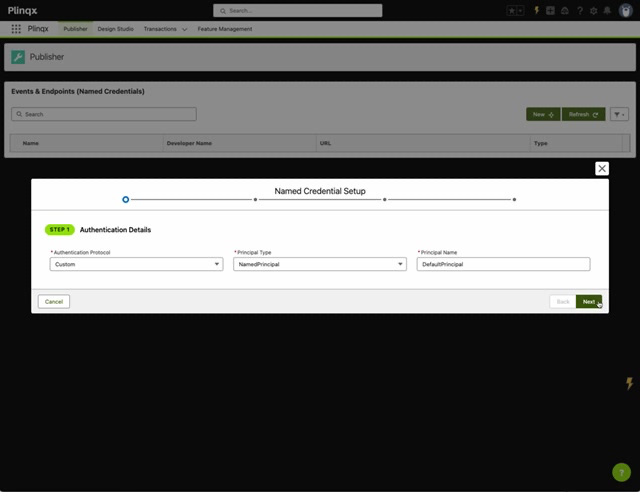
Step 1 - Authentication Details
In Named Credential Setup, configure the authentication approach.
Fields shown:
- Authentication Protocol (e.g., Custom, Basic Authentication, OAuth 2.0, JWT, etc.)
- Principal Type
- Principal Name
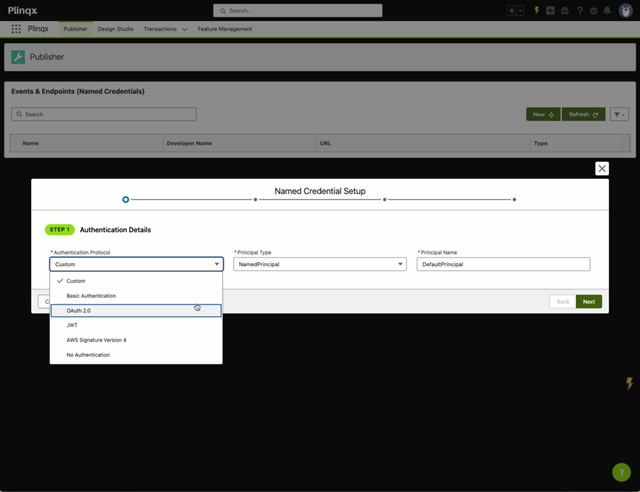
Click Next to continue.
Step 2 - External Credential
Set the External Credential that will be linked to the Named Credential.
Fields shown:
- External Credential Label
- Developer Name
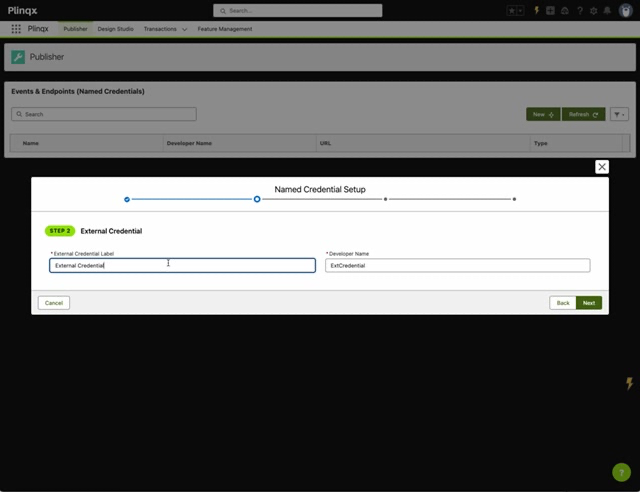
Click Next to continue.
Step 3 - Named Credential
Configure the Named Credential record.
Key fields:
- Named Credential Label
- Developer Name
- Base URL (the root URL for the external system, e.g.,
https://api.example.com)
Common options:
- Generate Authorization Header
- Allow Merge Fields in Header
- Allow Merge Fields in Body
Optional Credential Secret:
- Parameter Name (e.g.,
ApiKey,password) - Secret Value
- Store Encrypted
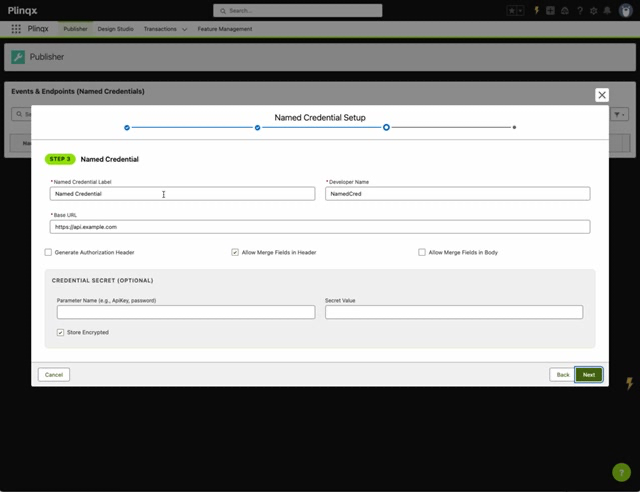
Click Next to continue.
Step 4 - Review and Create
Review the summary (protocol, principal, external credential, named credential, base URL) and click Create.
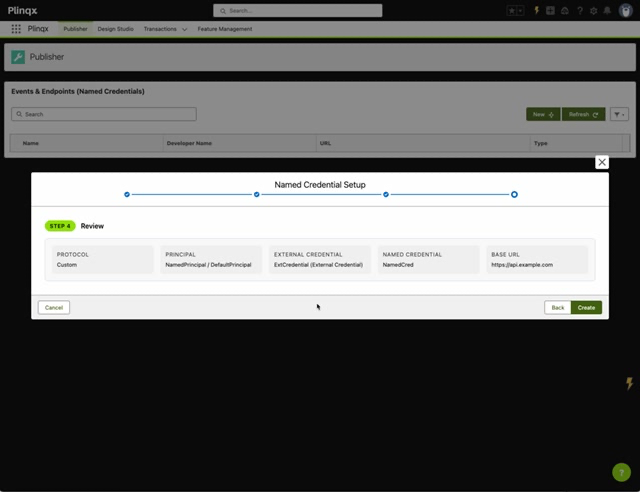
Confirm the record is created
After creation, Publisher shows a success toast and the Named Credential appears in the list.
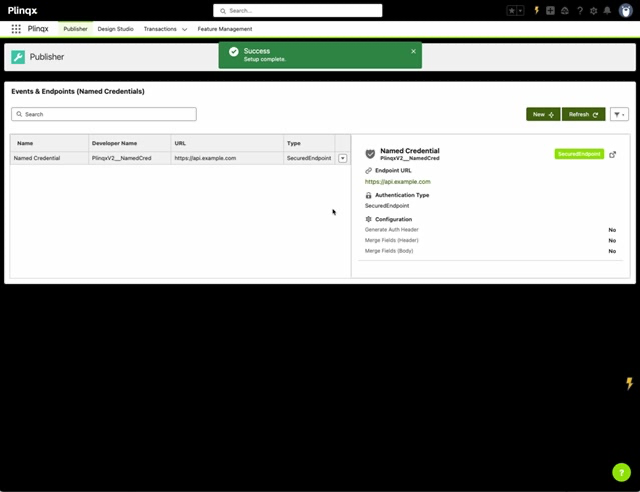
Verify and manage the Named Credential in Salesforce Setup
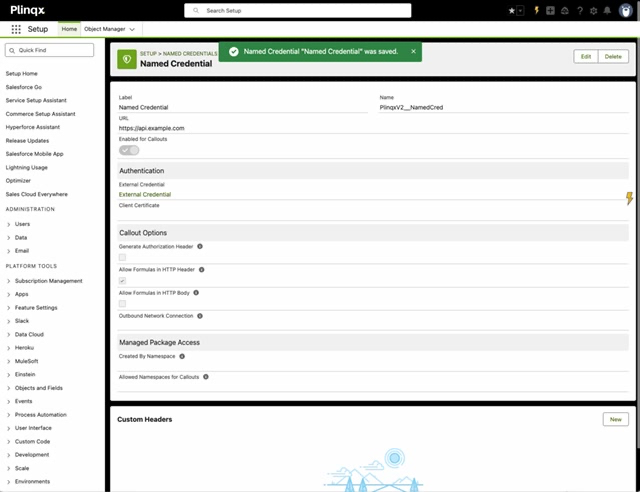
Publisher creates a standard Salesforce Named Credential that you can manage from Setup.
- Open Setup.
- Navigate to Named Credentials (Setup -> Named Credentials).
- Open the Named Credential created by Publisher.
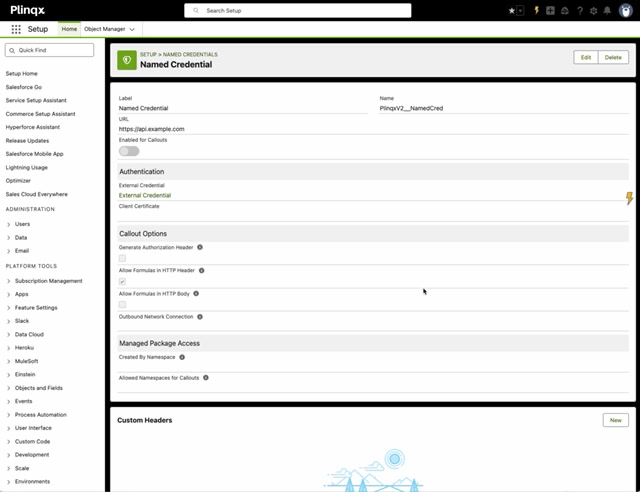
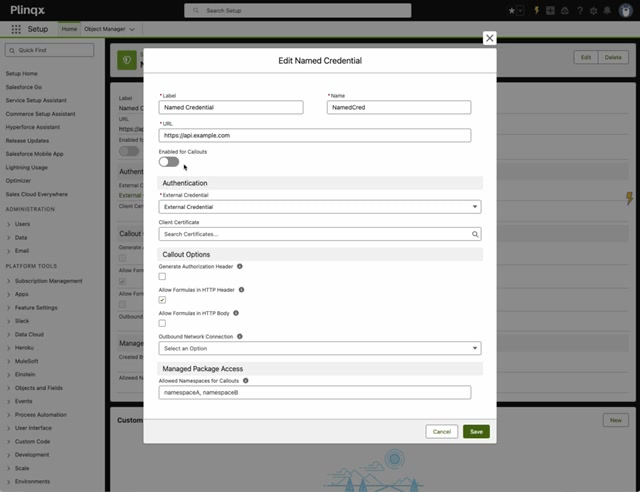
Edit details (if required)
Use Edit to update label, name, URL, authentication linkage, callout options, and managed package access.
After saving, you'll see a confirmation toast.
Best practices
- Use stable base URLs: create separate Named Credentials per environment (DEV/UAT/PROD).
- Keep secrets out of endpoint definitions: store API keys/passwords in the credential where possible.
- Least privilege: restrict creation/edit access to admins/configurators.
- Consistent naming: adopt a convention, for example:
EXT_<System>_<Env>.
Troubleshooting
The Named Credential doesn't appear in Publisher
- Click Refresh on the Named Credentials list.
- Confirm you have access to the relevant Plinqx Publisher screen and permission sets.
Callouts fail after configuration
- Confirm the Base URL is correct.
- Confirm authentication protocol and principal settings match the target system.
- Validate any required secrets/headers are stored and referenced correctly.
"Unauthorized" / "401" errors
- Re-check the authentication details in Setup -> Named Credentials.
- If using API key style auth, ensure the key is present in the secret field or in the configured header mechanism.