Using Step Designer
Available: Starter and Premium as a paid add-on
Audience: Administrators and Developers
Overview
The Step Designer is a visual interface for creating and managing STEP Orchestrations. It provides an intuitive drag-and-drop environment where you can design complex business processes by chaining together Flow and Apex steps, configuring their inputs and outputs, and managing the overall orchestration workflow.
This guide covers all aspects of using the Step Designer to create, configure, and manage your orchestrations.
Getting Started
Accessing Step Designer
The Step Designer is accessible through the Plinqx application. When you first open it, you'll see a clean interface with action buttons at the top and a design area below.

Main Interface Components
The Step Designer interface consists of several key areas:
- Header Bar: Contains orchestration information and action buttons
- Design Area: Where you build your orchestration by adding and configuring steps
- Step Cards: Individual step components that can be configured
- Modals: Pop-up dialogs for adding steps, saving, and other operations
Creating a New Orchestration
Step 1: Start a New Design
- Click the "New" button in the header bar
- A modal will appear asking for basic orchestration information
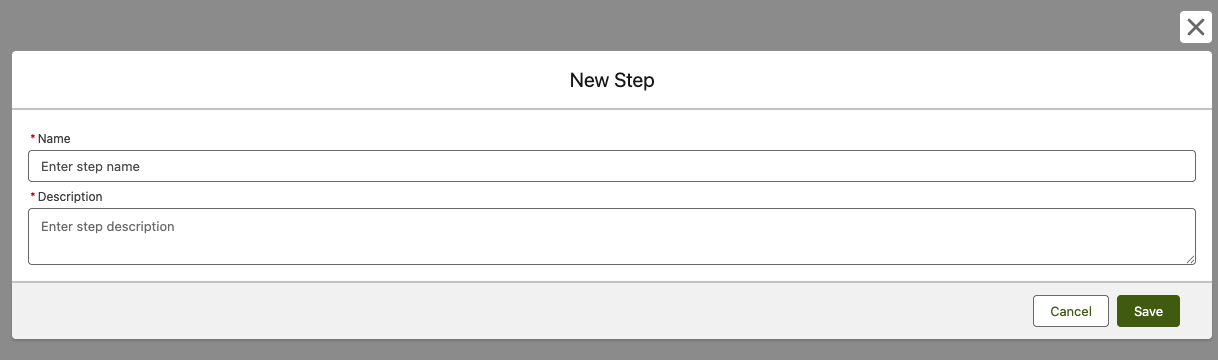
- Enter a Name for your orchestration (required)
- Enter a Description explaining what the orchestration does (required)
- Click "Save" to create the new orchestration
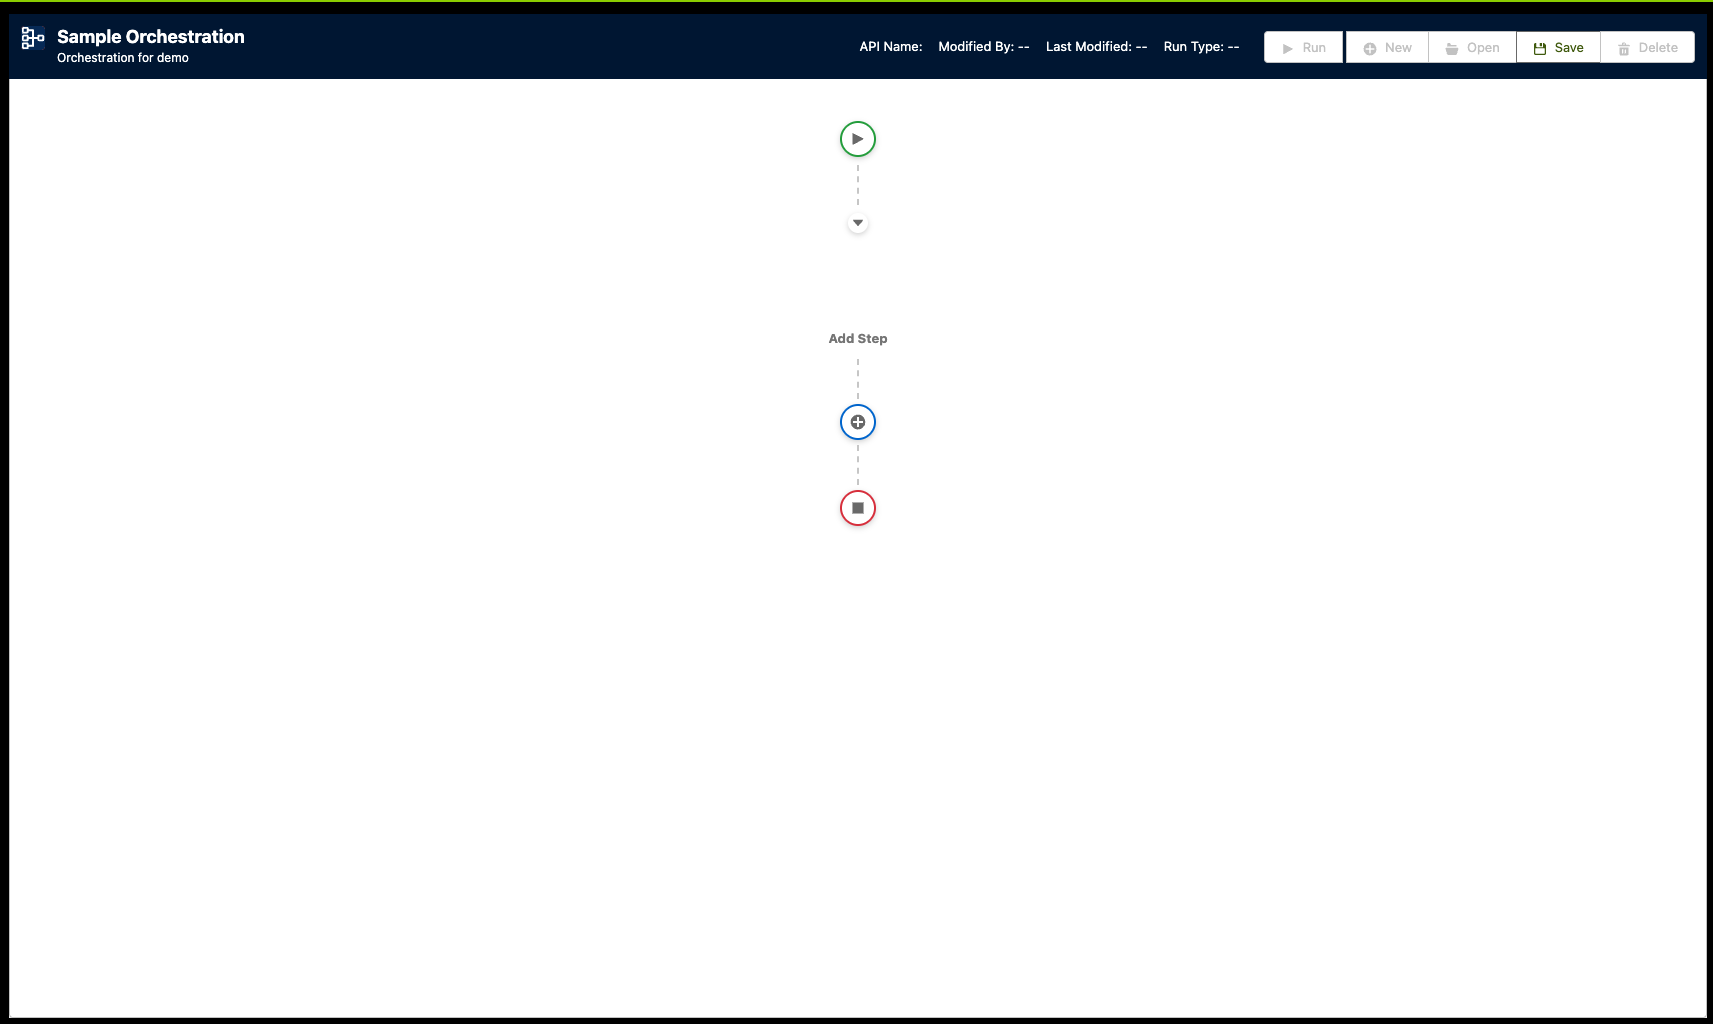
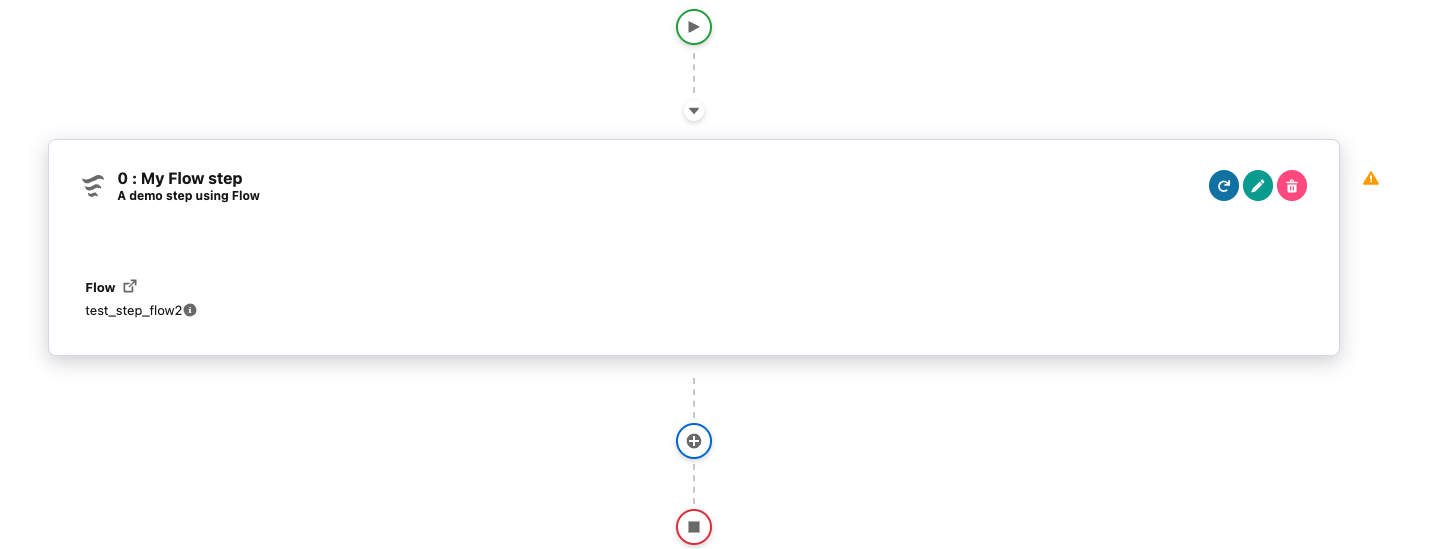
Step 2: Design Area Activation
After creating a new orchestration, the design area becomes active and you'll see:
- A start indicator (play icon)
- An "Add Step" button (+ icon)
- The ability to begin building your orchestration
Adding Steps to Your Orchestration
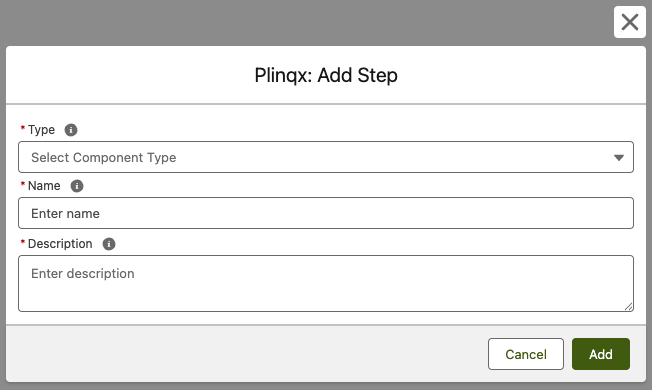
Opening the Add Step Modal
- Click the "+" button in the design area
- The "Plinqx: Add Step" modal will appear
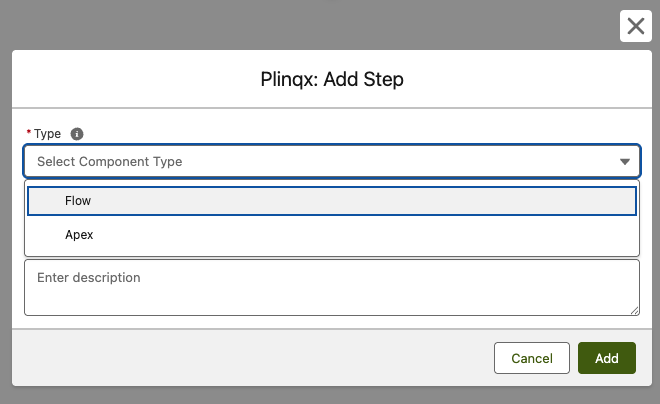
Step 1: Select Step Type
Choose the type of step you want to add:
- Flow: For declarative automation using Salesforce Flows
- Apex: For custom code execution using Apex classes
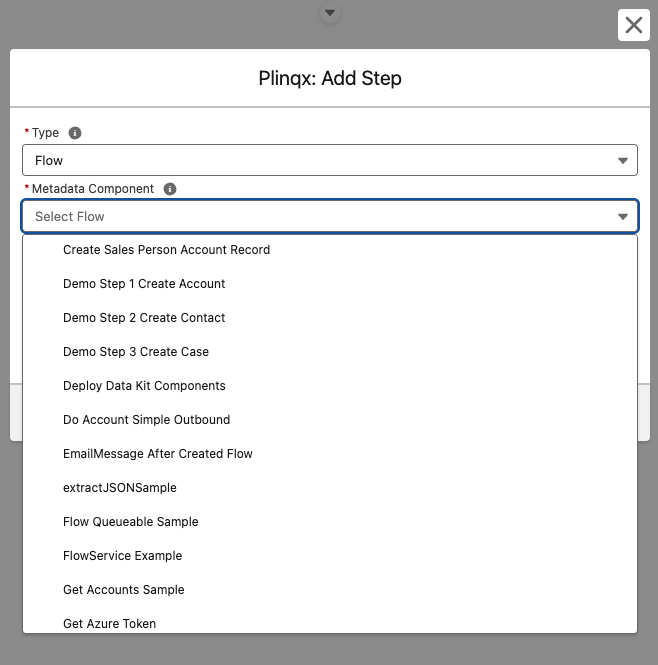
Step 2: Select Component
For Flow Steps:
- Select "Flow" as the type
- Choose from available Autolaunched Flows in the dropdown
- The system will automatically load the flow's input and output parameters
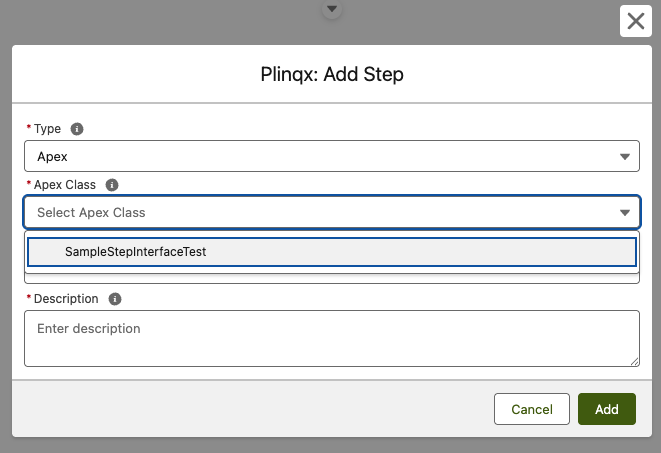
For Apex Steps:
- Select "Apex" as the type
- Choose from available Apex classes that implement the step interface
- The system will load the class's input and output parameters
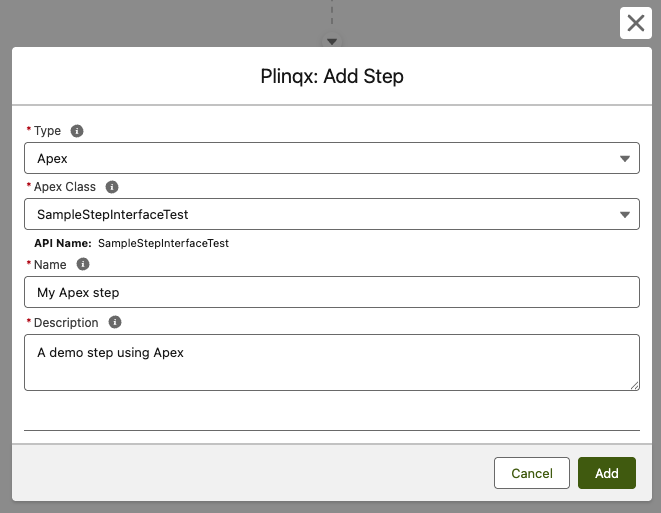
Step 3: Configure Step Details
- Name: Enter a descriptive name for the step (max 50 characters)
- Description: Provide a description of what the step does (max 255 characters)
- API Name: Automatically populated based on the selected component
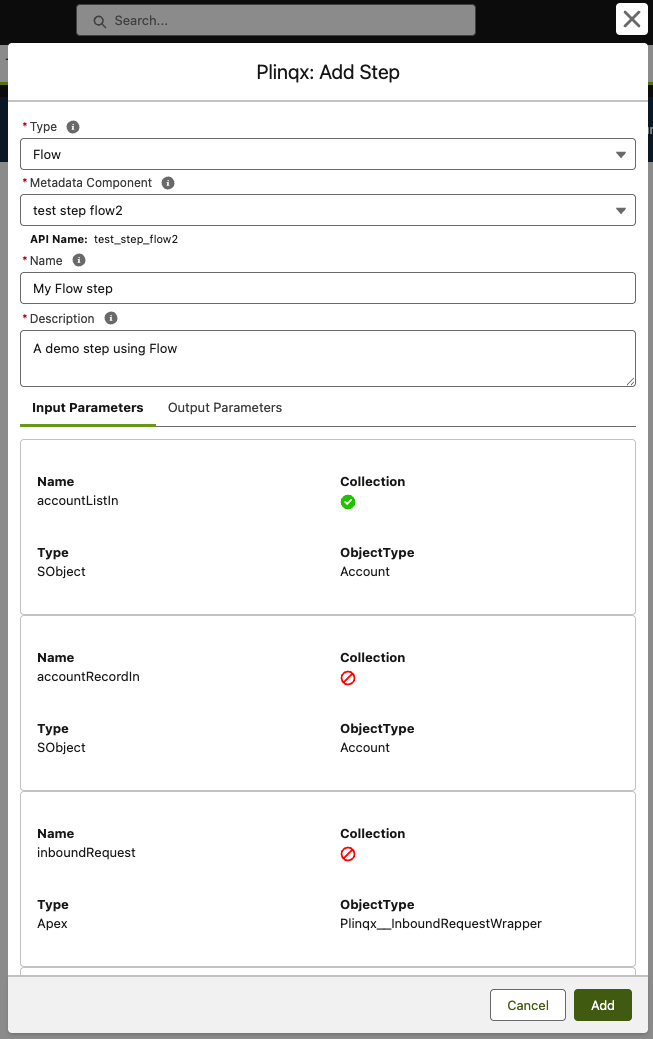
Step 4: Review Parameters
Parameters will only be available for Flow steps, Apex parameters are set dynamically within the designer and at run-time.
The modal will display the input and output parameters of your selected component:
- Input Parameters: Variables the step receives from previous steps or orchestration variables
- Output Parameters: Variables the step produces for use by subsequent steps
Step 5: Add the Step
Click "Add Step" to add the configured step to your orchestration. The step will appear as a card in the design area.
Managing Steps in Your Orchestration
Step Cards Overview
Each step in your orchestration appears as a card with:
- Step Information: Name, description, type, and version
- Action Buttons: Move up, move down, configure, and delete
- Status Indicators: Visual cues for step configuration
Moving Steps Up and Down
To reorder steps in your orchestration:
- Move Up: Click the up arrow (↑) to move a step earlier in the sequence
- Move Down: Click the down arrow (↓) to move a step later in the sequence
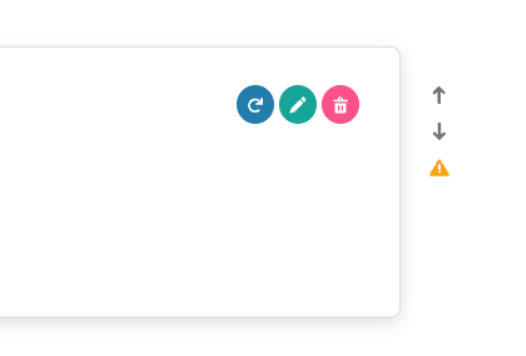
Note: Steps execute in the order they appear from top to bottom.
Configuring Step Parameters
Click the configure button (pencil icon) on a step card to open the configuration modal.
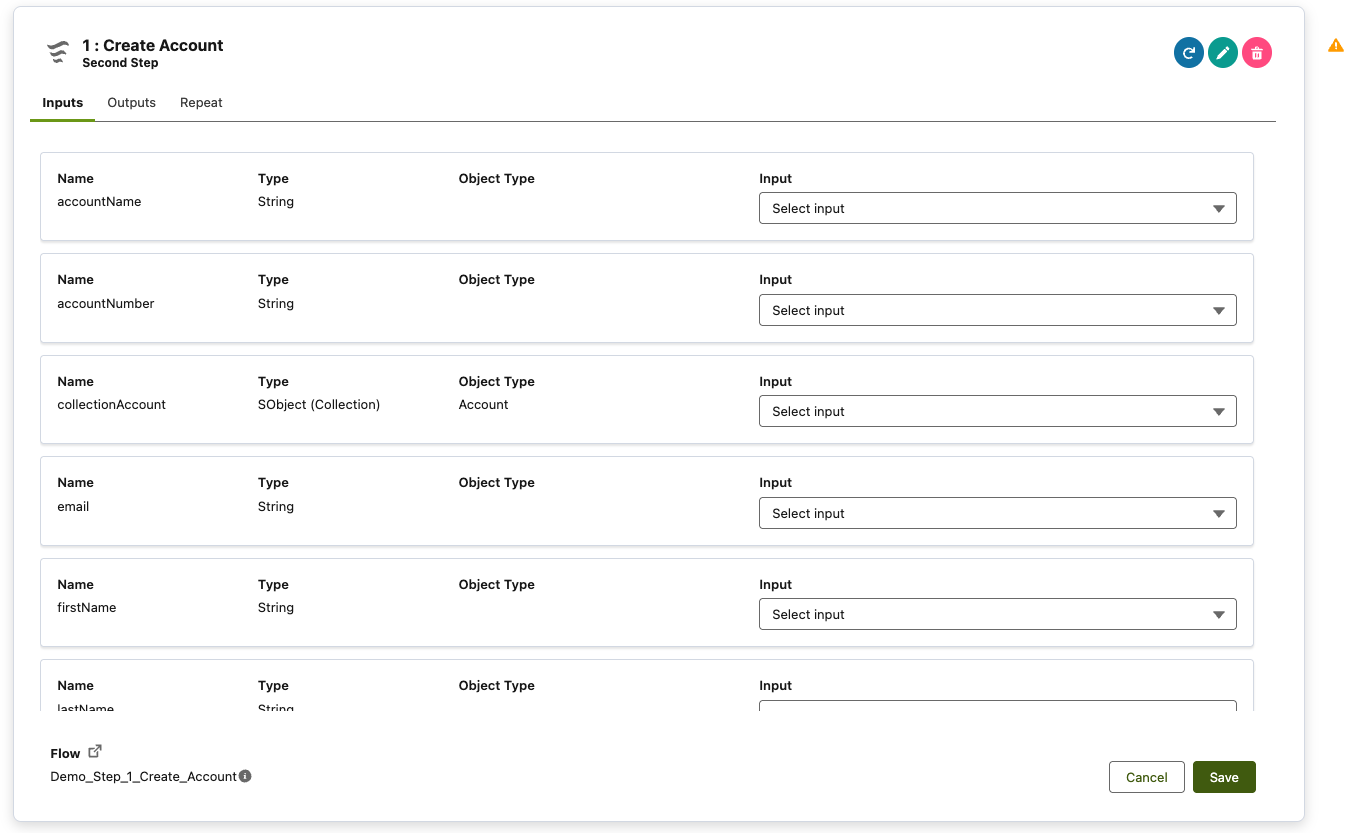
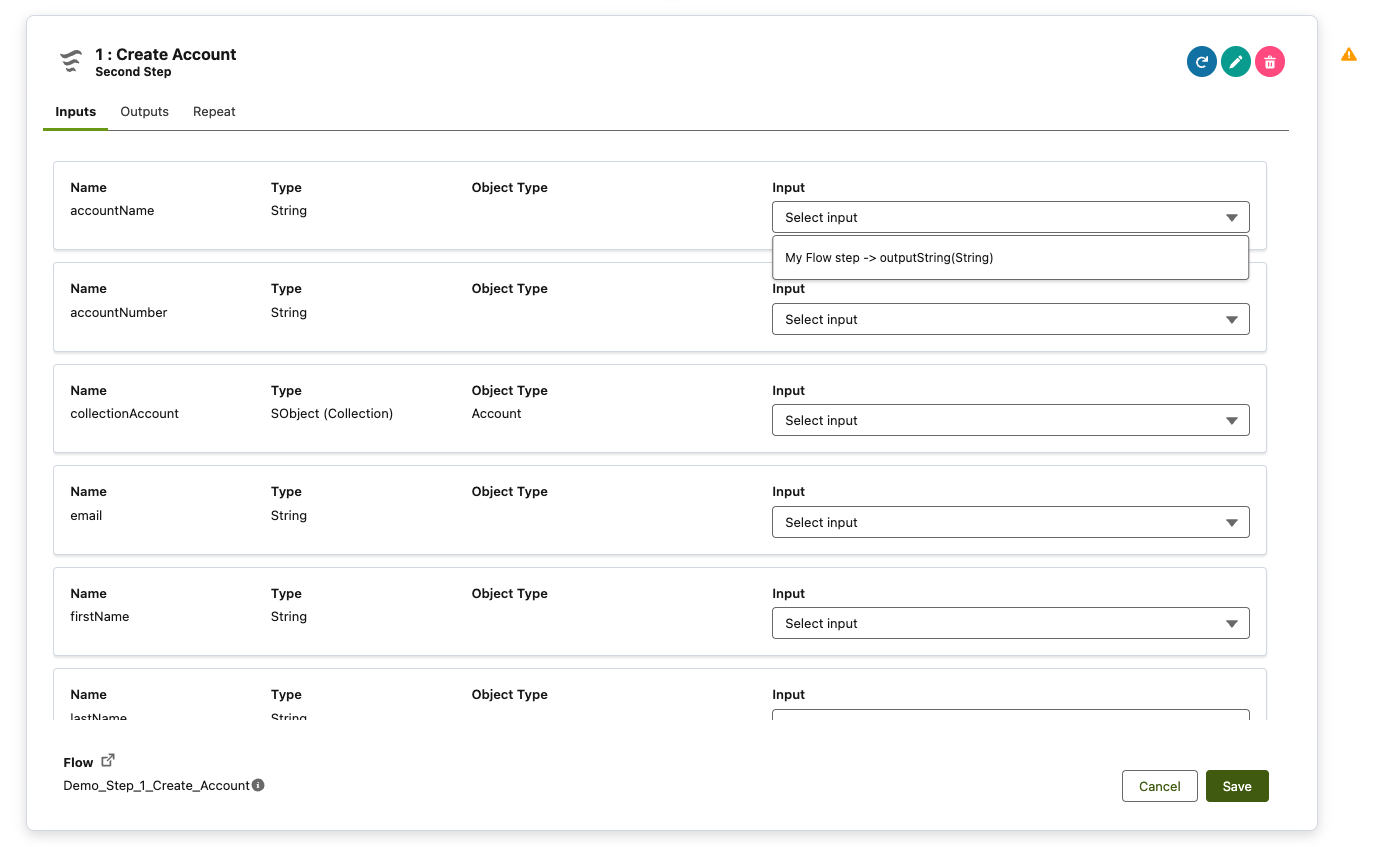
Input Parameter Mapping
Configure how input parameters receive data:
- Orchestration Variables: Map to orchestration-level variables
- Previous Step Outputs: Map to outputs from previous steps
- Direct Values: Set static values for parameters (Apex steps only)
Output Parameter Configuration
Output variables are only configurable for Apex steps. Variables for flows are set within the flow itself.
Configure what data the step produces
- Variable Names: Ensure output variable names match your requirements
- Data Types: Verify data types are correct for subsequent steps
- Collection Settings: Configure for single values or collections
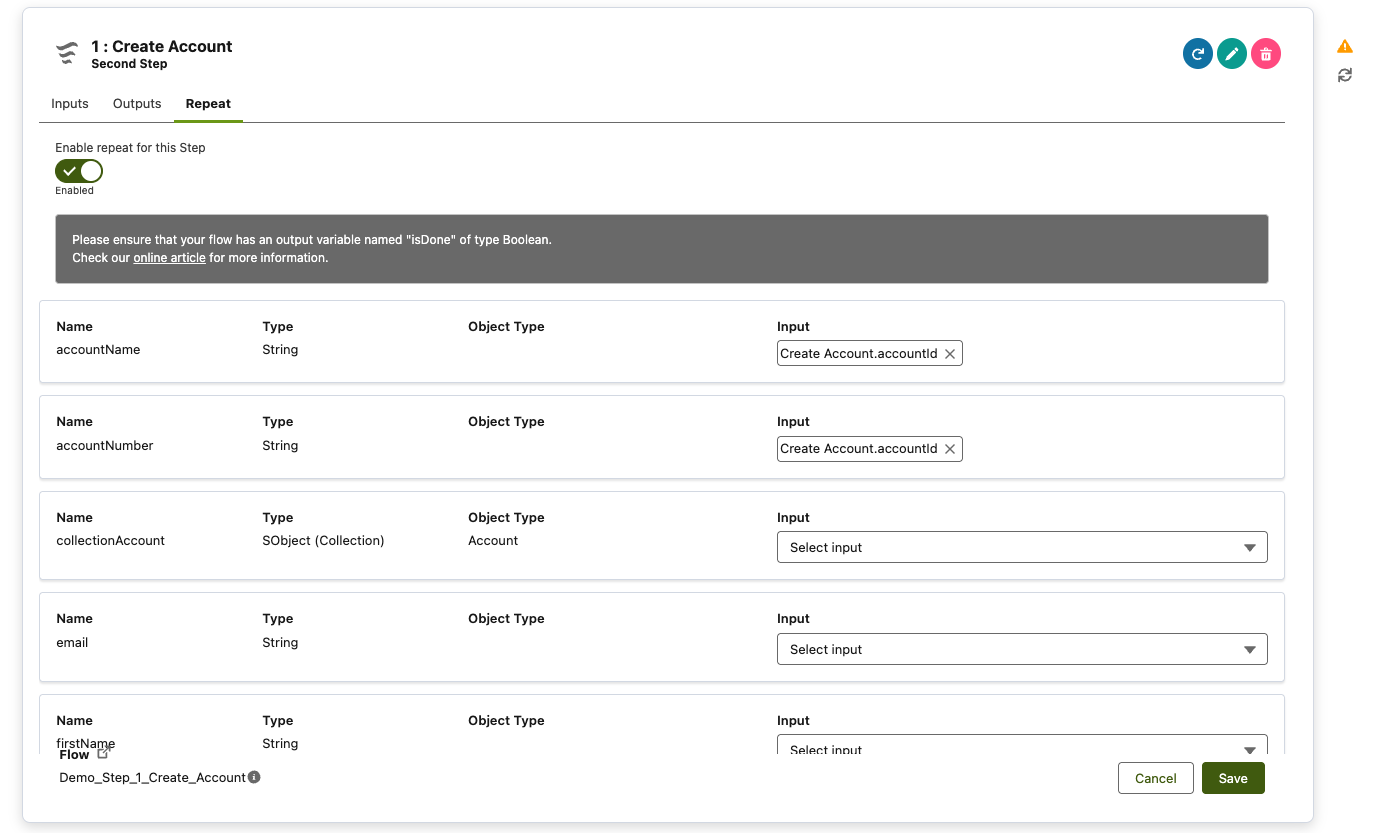
Repeat Logic Configuration
For steps that need to execute repeatedly:
- Enable Repeat: Toggle the repeat option for the step
- Repeat Parameters: Configure which parameters control the repeat logic
- Completion Criteria: Set the
isDoneparameter in your Apex class or Flow
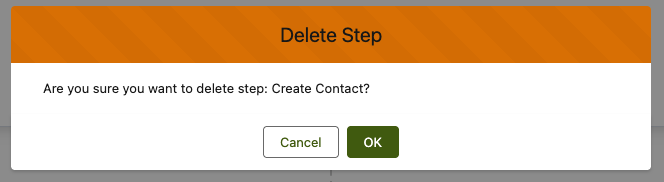
Deleting Steps
To remove a step from your orchestration:
- Click the delete button (trash icon) on the step card
- Confirm the deletion in the confirmation dialog
Saving Your Orchestration
Step 1: Prepare for Save
Before saving, ensure:
- All steps are properly configured
- Input/output parameters are correctly mapped
- The orchestration has a meaningful name and description
Step 2: Save the Orchestration
- Click the "Save" button in the header bar
- A save modal will appear with deployment options
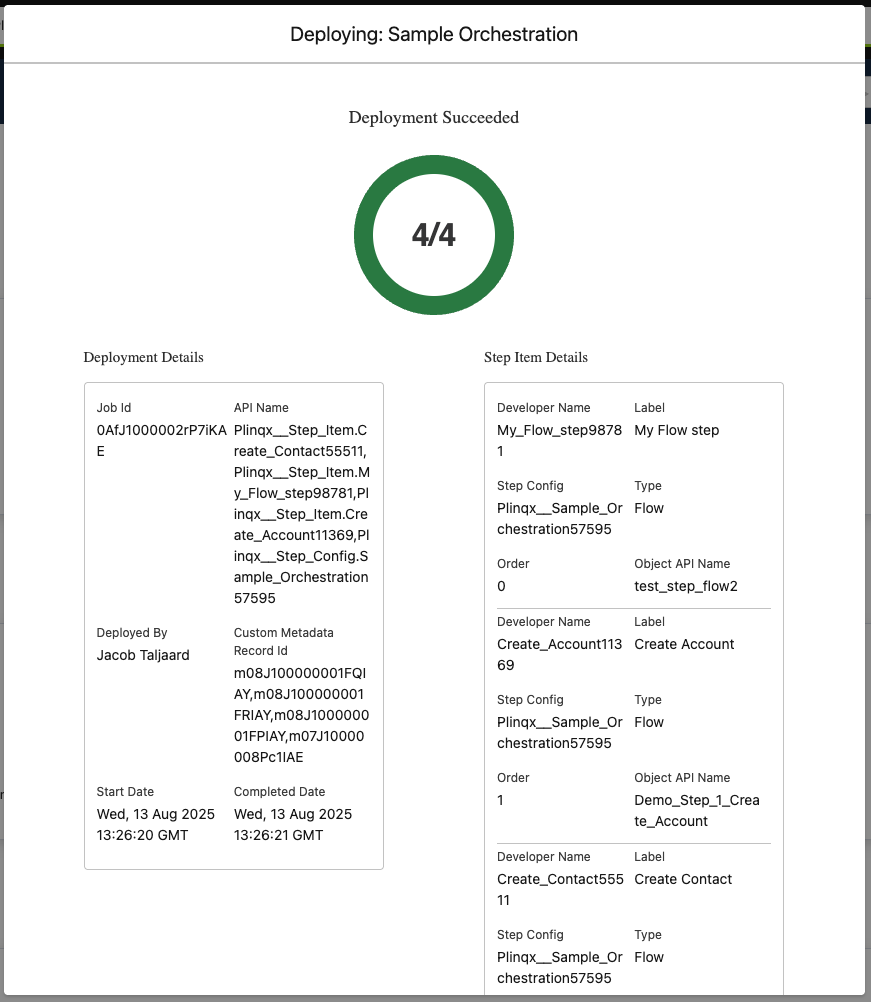
- The system will deploy your orchestration configuration
- Progress will be shown during the deployment process
- Success confirmation will appear when complete
Step 3: Post-Save Actions
After saving, you can:
- Run the orchestration immediately
- Open other orchestrations
- Create new orchestrations
- Delete the current orchestration
Opening Existing Orchestrations
Step 1: Open Orchestration
- Click the "Open" button in the header bar
- A modal will appear with available orchestrations
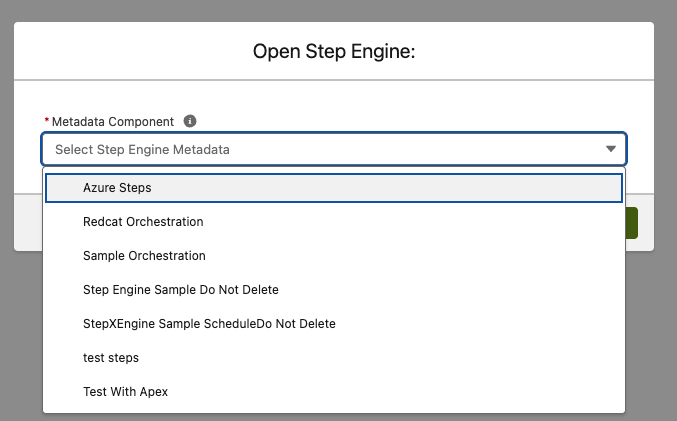
Step 2: Select Orchestration
- Choose the orchestration you want to open from the dropdown
- Click "Open" to load the orchestration
Step 3: Review Loaded Orchestration
The orchestration will load showing:
- Orchestration Details: Name, description, API name
- Step Sequence: All configured steps in order
- Configuration Status: Whether steps are properly configured
Executing Orchestrations
Manual Execution
To run an orchestration immediately:
- Ensure the orchestration is saved
- Click the "Run" button in the header bar
- The orchestration will start executing

Execution Monitoring
During execution:
- Status Updates: Monitor progress in real-time
- Step Completion: Track which steps have completed
- Error Handling: View any errors that occur
Deleting Orchestrations
Step 1: Initiate Deletion
- Click the "Delete" button in the header bar
- A confirmation dialog will appear
Step 2: Confirm Deletion
- Review the orchestration name to ensure you're deleting the correct one
- Click "Delete" to permanently remove the orchestration
- Click "Cancel" to abort the deletion
Step 3: Post-Deletion
After deletion:
- The interface will reset to a clean state
- You can create a new orchestration or open an existing one
- The deleted orchestration cannot be recovered
Advanced Configuration
Flow Step Configuration
When configuring Flow steps:
- Input Variable Mapping: Map orchestration variables to flow input variables
- Output Variable Collection: Configure how flow outputs are captured
- Error Handling: Set up fault paths for flow errorsconfigurea
- Repeat Logic: Configure the
isDonevariable for repeat functionality
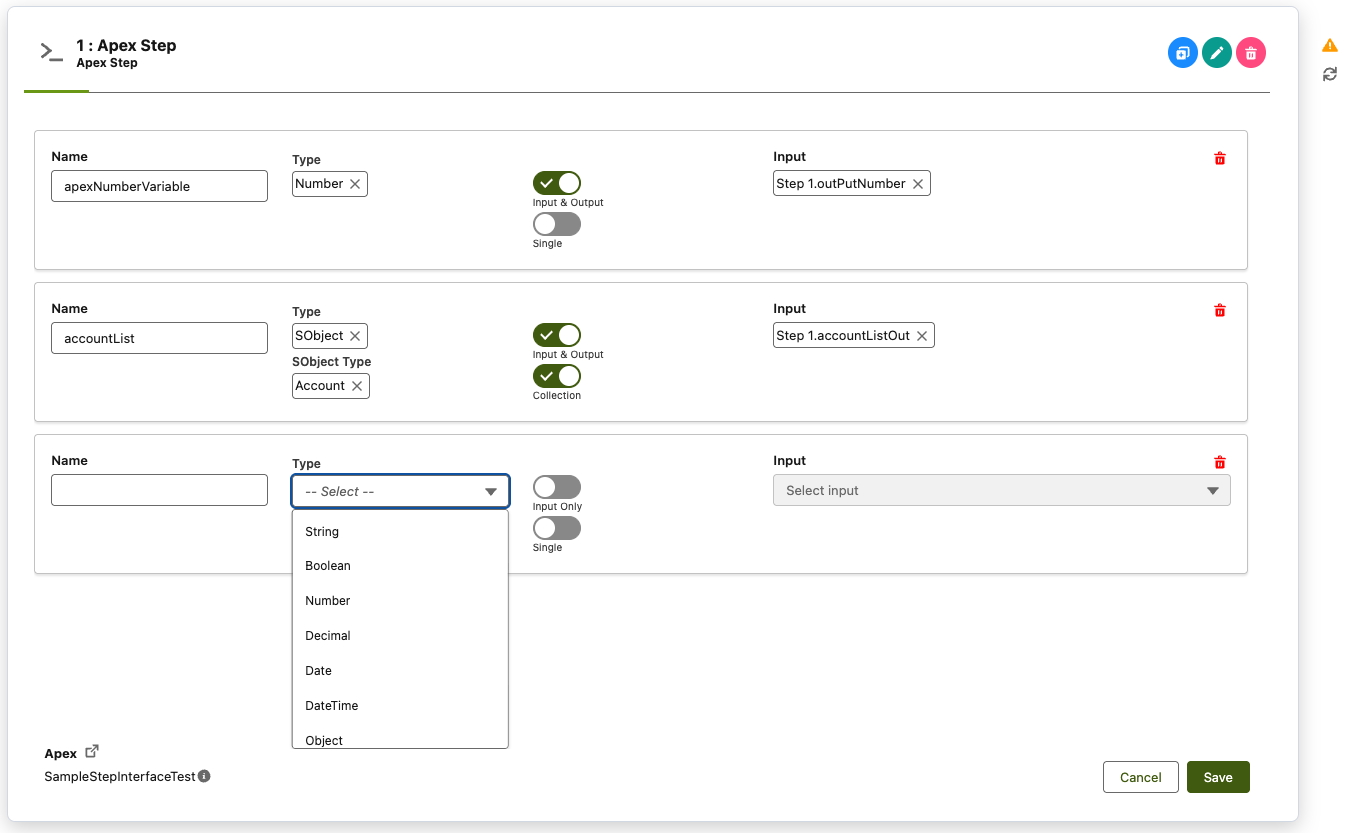
Apex Step Configuration
When configuring Apex steps:
- Input Parameter Types: Provide a Name, Type (Data type), Specify whether the the variable is an input or output and input, specify whether the variable is a collection.
- Input Variable Mapping: Map orchestration variables to apex input variables - only matching data types will be available
- Error Handling: Set up exception handling for Apex errors
Repeat Logic Setup
For steps that need to repeat multiple runs:
- Enable Repeat: Toggle the repeat option for the step
- Configure Repeat Parameters: Set up parameters that control the repeat logic
- Set Completion Criteria: Configure the
isDoneparameter to determine when to stop in your Apex class or Flow - State Management: Ensure state is properly maintained across iterations within your Apex class or Flow
Best Practices
Orchestration Design
- Clear Naming: Use descriptive names for orchestrations and steps
- Logical Flow: Design steps in a logical sequence
- Error Handling: Include error handling in your steps
- Documentation: Provide clear descriptions for all components
Step Configuration
- Parameter Mapping: Carefully map input and output parameters
- Data Types: Ensure data types match between steps
- Repeat Logic: Test repeat logic thoroughly
- Performance: Consider the impact of step complexity
Testing and Validation
- Unit Testing: Test individual steps before adding to orchestrations
- Integration Testing: Test the complete orchestration flow
- Error Scenarios: Test error conditions and recovery
- Performance Testing: Test with realistic data volumes
Troubleshooting
Common Issues
Step Won't Add:
- Ensure the component (Flow/Apex) is active and accessible
- Check that required fields are completed
- Verify the component name is unique within the orchestration
Configuration Errors:
- Verify input/output parameter names match exactly
- Check data types are compatible
- Ensure required parameters are mapped
Save Failures:
- Check that all steps are properly configured
- Verify orchestration name and description are provided
- Ensure you have the necessary permissions
Execution Errors:
- Review step logs for specific error messages
- Check input parameter values
- Verify step dependencies are met
Getting Help
If you encounter issues:
- Check the error messages for specific guidance
- Review the step configuration for common mistakes
- Test individual steps to isolate problems
- Contact support with specific error details
Conclusion
The Step Designer provides a powerful and intuitive interface for creating complex business process orchestrations. By following this guide and best practices, you can effectively design, configure, and manage orchestrations that automate your business processes while maintaining the benefits of limit-safe, containerized execution.
The visual design approach makes it easy to understand and modify orchestration flows, while the comprehensive configuration options ensure you can handle even the most complex business requirements.